The Game starts
The Queen
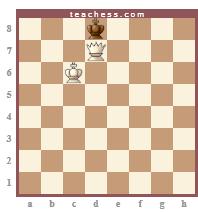
This is a very simple Mate but the Queen always needs the help of her own King.
IMPORTANT
A lone piece cannot give Checkmate to a Lone King without help.
1. Identification of the Checkmate Area:
These are some typical positions.
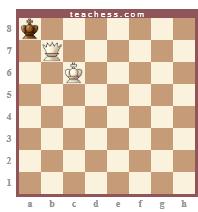 |  |
| The Strong King supports the Queen . | The Strong King prevents the escape of the enemy monarch |
2. Typical procedure:
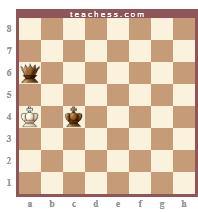
Whenever the Lone King is far from the Checkmate Area, it is necessary to ¨ push ¨ it there
 |
Whenever the Lone King is far from |
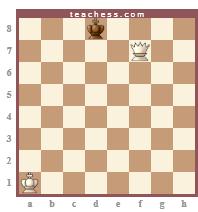
An effective and very graphic form of pushing the Lone King to the edge is to reduce his space (the squares where he can move) by placing our Queen in a square a “Knight’s jump” from the King.
The Lone King will go, step by step, to the “Disaster Zone” where the Queen with the Strong King’s help will give Checkmate.
1. Qe3 Kc6 |
 |
|
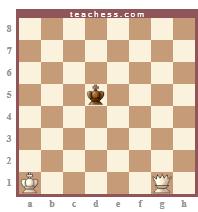
WARNING!!
| We have to take into account that if we do not stop our “Knight’s jump procedure” in time, moving Qc7?? (after 6. Qe7 Kb8 7. Qd7 Ka8 8. Qc7??) a Stalemate position can be produced. |
|
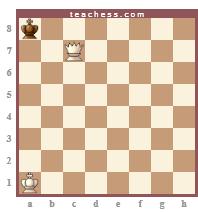 .
.Apart from the danger of the Stalemate Position, there is no reason to continue with the procedure since the Lone King is confined enough.
Now we only need the Strong King’s help.
6. Kb2 Kb8 |
|